Tuesday, 31 May 2011

Zip it, Zip it good!!

Once you've finished your little rendition of Devo's 'Whip it' we'll make a start...

How’s your panel looking??


If you need to catch up you can check out the first two posts here:


Part One - Getting started - deciding what to make and making the pattern


Part Two - Preparing the feature panel and cutting the pieces


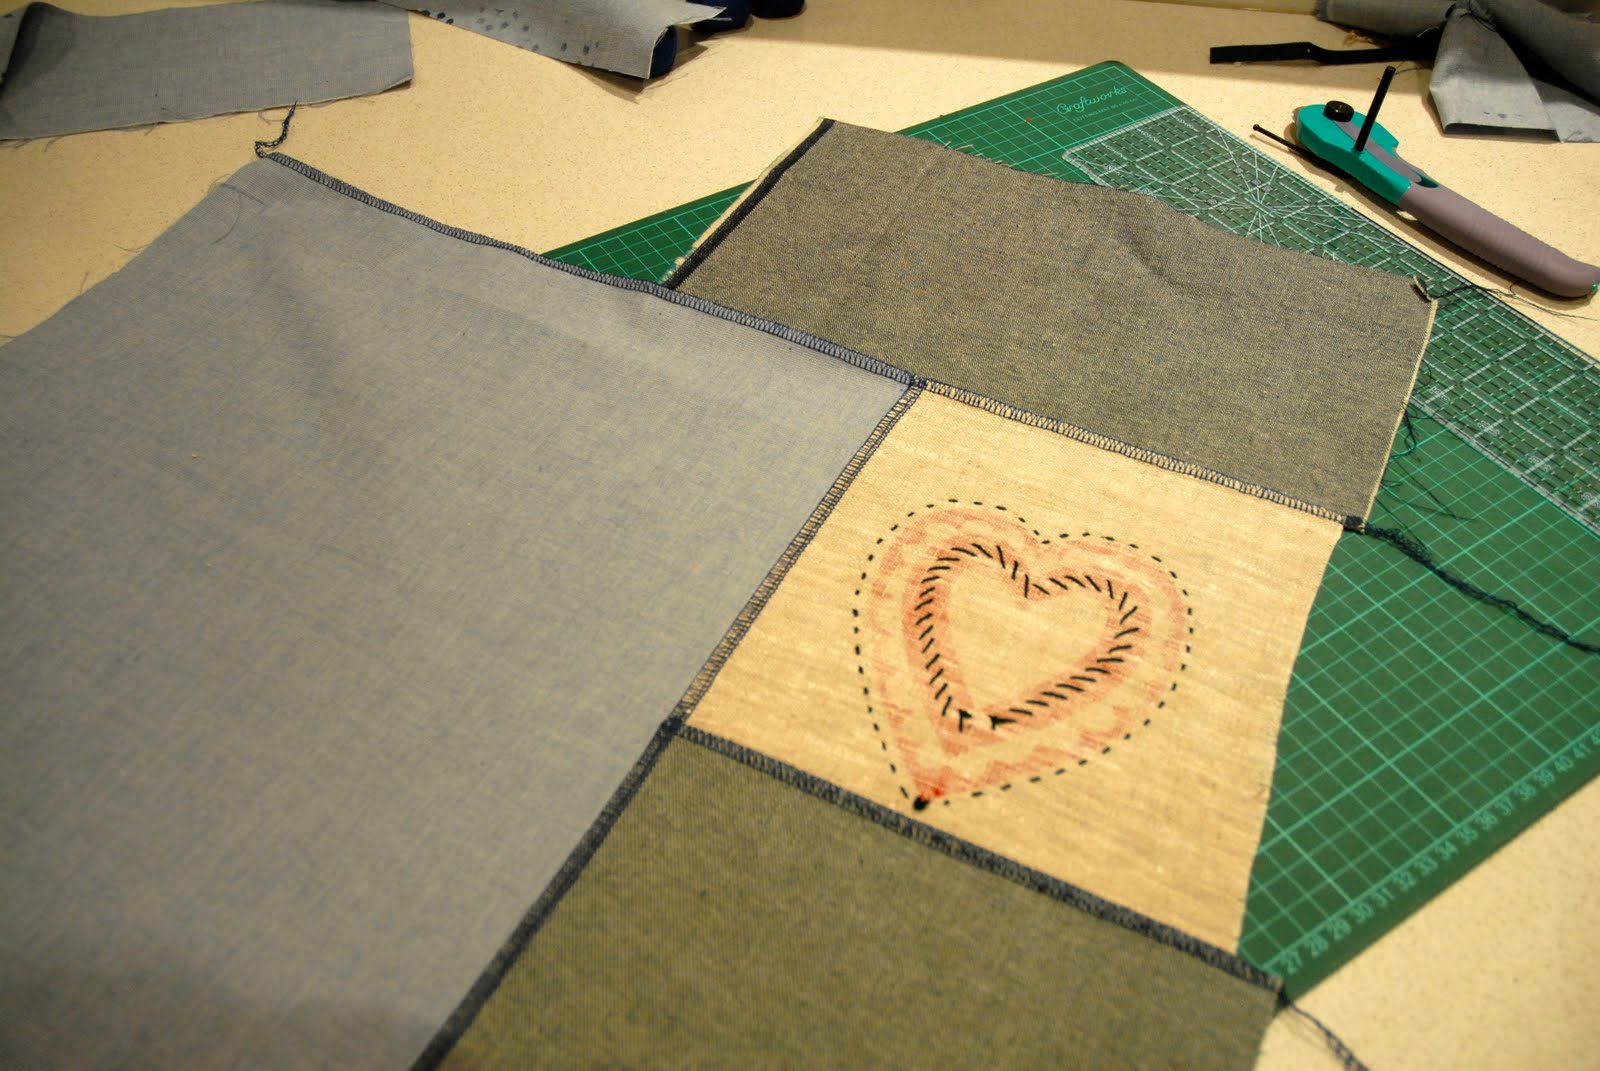
When you finished cutting you should have ended up with something that looks like this.

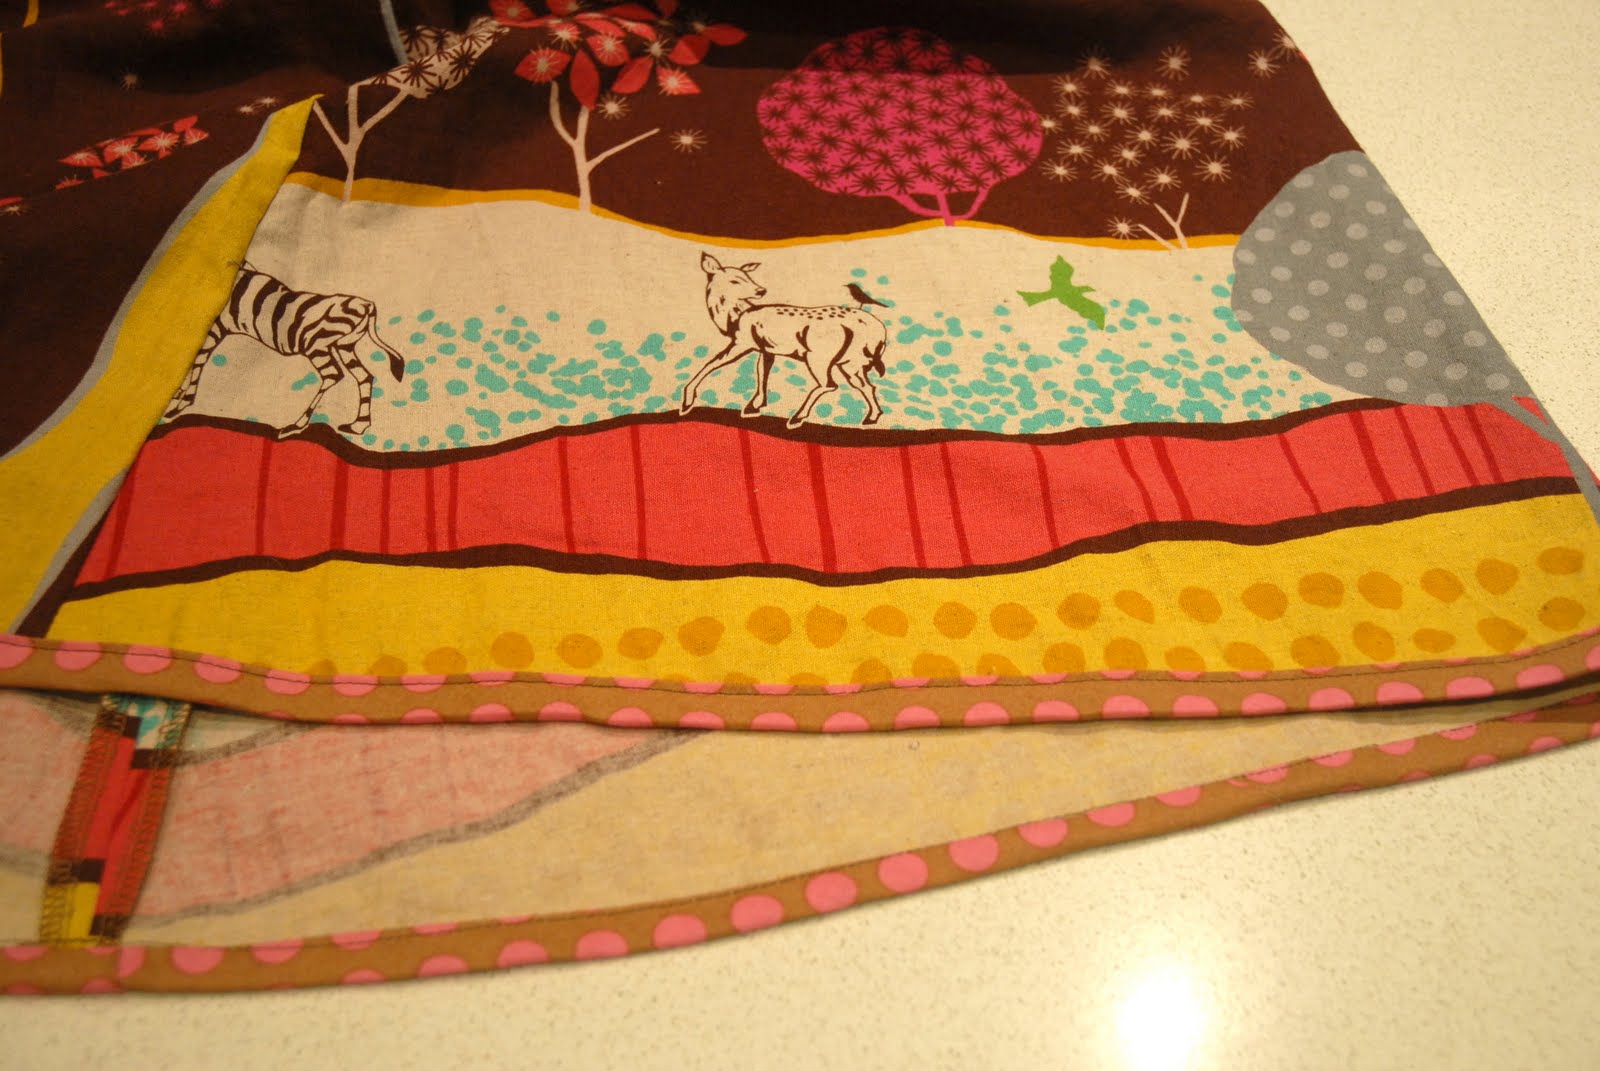
Two main panels - decorative front and plain back and two identical facings

In case you missed the instruction last time - you should now overlock the side edges of both the main skirt pieces.

Don’t trim anything much off here - you are just trying to finish the edges, so don’t overlock the two pieces together, we’re not making a seam.


Next, on to the zip.
I am working with an 18cm zip.
(NB. If you are making an elastic waisted skirt you can forget this whole zip business, just make your side seams, tailoring the skirt to fit.)
I have tried putting the zip in two ways - the way shown in the Sew What Skirts book and an alternate way shown to me by the lovely Kathryn of Our Shabby Cottage.


This was using the Sew What Skirts method - it's not sewn as close to the zipper teeth as the one below.


This was using the 'Shabby Cottage' method - much better result, not as 'gapey'. (yes I'm sure that's a word!)


I preferred both the result, and also the method, that Kathryn used - so that’s what I am going to show you now.
Take a deep breath - I promise you will be pleasantly surprised at how easy this is.
I prefer my zips to be in the left hand seam of the finished garment, so as you look at the skirt inside out you will now begin working on the right hand seam.
Trust me, when you turn it out the right way it will be on the left of the front panel.


Measure along your side seam and place a pin at the 19cm mark (remember an 18 cm zip is actually longer than this once you include the tape, the actual ‘teeth’ section is what measures 18cm).


Start by setting your sewing machine to a long basting stitch - so your longest straight stitch.
Now sew the seam using this long stitch until you reach the pin. 

Don’t finish sewing here - just backtack to secure the end then stop and leaving the needle in the fabric, adjust your stitch length to a regular length, and continue to sew the length of the seam to the bottom of the skirt.
Press the seam open.


With your skirt still wrong side out, open the zip and lay the right hand tape, right side down over the seam so the teeth of the zip are lying along the seamline. 
The top of the zipper tape, not where the teeth start, should be level with the top of the skirt, (if you have the teeth at the top you will find you have no seam allowance for attaching either a facing, bias or a waistband later.)

Pin the zip into place along this one side of the tape.
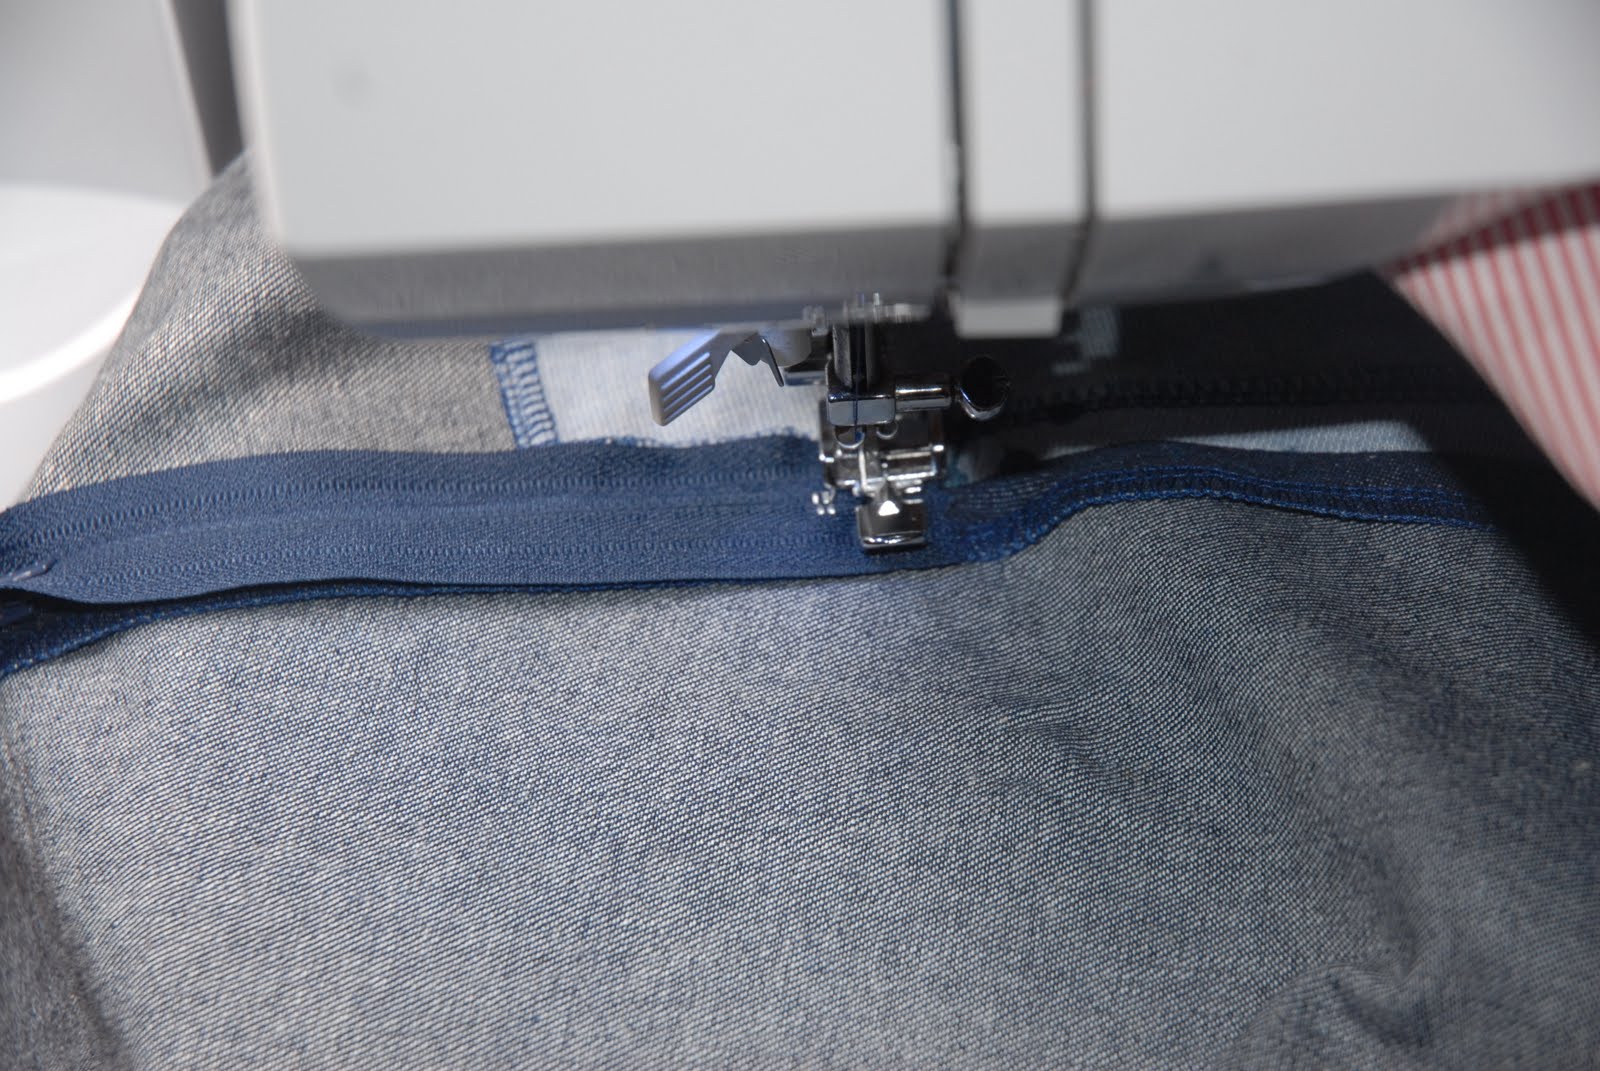
Before you sew make sure you have your zipper foot on your machine.
This is what my zipper foot looks like, get to know your feet - it really helps!


Now starting at the waist of the skirt, sew carefully down the right hand side, keeping the foot running as close as you can to the zipper teeth.

You will need to stop about 4cm from the end of the zip and move the zipper head so you can continue sewing.


To move the zipper head, stop sewing with the needle down, lift your presser foot and using your fingernail (or a pair of tweezers or a tailors awl) push the zipper head toward the waist of the skirt, closing the zip in the process.


Lower the presser foot and continue sewing to just beyond the end stop of the zip (this is the small piece of metal that marks the end of the zipper teeth.)
Again finish with the needle in the down position.
Lift the presser foot and turn the skirt 90 degrees so you can sew across the end of the zip.


Do this then turn the skirt 90 degrees so you will now be heading back along the opposite zipper tape toward the waist.


Check that the zipper teeth are lying along the seam line and pin the zip into place if you prefer, (I find it easier not to, but whatever makes it easiest!)
Sew along the zipper tape and when you reach the zipper head again leave the needle down, lift the foot and by putting your fingernail on the zipper ‘head’ push it along so it is clear of the foot.


Just like before...


Sew the remainder of the seam and backtack at the waist.
Phew - breathe out - all the hard work is done!
Now take your super-duper Clover seam ripper and, starting at the waist, gently remove the large basting stitches you put in earlier.


Now sit back and enjoy your handiwork, zip it up, zip it down, zip it up, zip it down!!


The next step is putting in the facing - click here to keep sewing along.

Sunday, 29 May 2011

Panel Beating - Part 2

Ok - so how'd you go with the pattern??

All OK I hope??
Ready to move on?

Let's get stuck into making up the fabric panel that we will cut the front of the skirt from.

Just to clarify - the front is the pretty stuff - the Prints Charming panel for my skirt.
The back of mine is just going to be plain denim.

To work out how big to make your panel, measure a straight line across your pattern from the widest point of the flare of the skirt to the straight edge of the fold line.

Mine measured 44cm so I need a panel that is at least 88cm wide at the bottom to fit the pattern piece.


Lay the fabrics out on the floor and have a play with the layout of them...


Until you get something that you like...


And that will fit your pieces.
Lay the pattern piece on every so often to see how you're going.


Once you're happy start piecing them together.
Taking a photo of the layout at this point is actually quite handy to refer to as you go.

First I joined the two red pieces at the bottom.

I prefer to overlock these as I think it gives a nice clean finish on the inside.

Press the seams to one side as you go.


Next I joined the little bird to the heart.


And trimmed the edge so I could add the next piece.

I decided I wanted some topstitching late in the process - really if you want to topstitch do it now, before you add the next piece.
This way the backtacked ends will be concealed in the seamlines and it will have a neat finish.


Then I added the blue whirligigs...


And another smaller piece at the top.
Remember that the top won't need to be as wide as the bottom because the skirt is much narrower at the waist.


Here's what it looks like on the back...


Then I added the big blue circular starburst piece to the side and joined all that top 'blue' section to the red striped pair at the bottom.

I offset the bottom seamline slightly because I think it looks better that way, not just a long straight line down the centre front.

If you wanted to, you could wait til this point to do topstitching by hand, like on Kirsten's skirt in the last post.


Now to cut!
Fold your fabric in half, I chose to do it along the seamline so this seam will run down the centre front of my skirt


Lie your fabric on top, making sure there is enough underneath to ensure the entire pattern is on some fabric, and away you go!


If you are doing a side zip - then cut the back on the plain piece of fabric in exactly the same way.
So you end up with one large piece for the front and another large piece for the back.

If you are doing a back zip - cut two single pieces (not on the fold), but be sure to add a seam allowance along the straight edge marked as 'fold'.
You'll need this to join the pieces together later.
Refer to the book if you are not sure.

Once you've cut your pieces out, overlock (or do the finish of your choosing) along the side edges of  both pieces.
Don't do the top and bottom of the skirt.

OK - you're doing well!

Now come on back soon for instructions on inserting the zip - trust me - it's easy and I will include lots of photos.

Click here to go straight to the post about zipping it!

Saturday, 28 May 2011

A Charming skirt - Part 1

**Edit**
The full set of links to all steps is at the bottom of this post.

OK - so I am a day or two late again - I could give you excuses about a kid who keeps throwing up at night (in my sewing and blogging time!) and having no camera but let's just get stuck into it.

For those who aren't sure of how this sewalong came about here's a little run down.

Lovely Sheridan organised Sew It Together in Sydney earlier this year.
During this time we visited the amazing Prints Charming studio and many of us left with a pack filled with gorgeous printed panels, and plans to replicate this gorgeous skirt as worn by Kirsten at the studio.

The skirt everyone wanted!

From this beginning we hatched...

THE PLAN

Using the Sew What Skirts book we would draw up a pattern suited to our own shape and size and make ourselves a Prints Charming skirt.

That said, this sewalong is open to everyone - so please leave a comment so I know you are joining in - and grab yourself a button to add to your blog.
You can make your skirt up using any fabric scraps you like - or do it 'straight up' - with no scrap panels, just using your favourite fabric.

First off - you need to make a few decisions about the skirt you want to make.

What style of skirt?
  • Straight or A-line are generally the chosen two.
  • A-lines are flattering to most figures whereas straight skirts are often more comfortable for less curvy ladies!

What type of waist do you prefer?
  • You can have a basic elastic casing with elastic threaded through - make sure you add length to the top of your skirt to accommodate the casing if you are going to do this.
  • A fitted waist with a facing on the inside to finish it.
  • A fitted waist with a bias trimmed edge at the top and no internal facing.
  • Or you could add a waistband to the top of the skirt if you prefer it to sit a little higher.
I'm going with a fitted waist with a facing, so it looks like this on the inside when finished:

A facing on the inside finishes the garment off nicely
Where do you want the zip?
  • This is just a personal preference thing - it can essentially be at the side or the back.
  • If you are putting it in at the side you cut two identical skirt pieces.
  • If it's going in at the back you cut one piece on the fold which becomes the front of the skirt then you cut two pieces not on the fold with added seam allowance along the centre edge so you can sew them together as you put the zip in.

What sort of hem do you want to do?
  • You can do a basic turned under hem, folding the fabric under twice and then stitching close to the upper edge.
  • A bias trimmed hem showing the bias on the outside of the skirt like this one:
Bias trimming on the outside can be an added feature
  • Or a bias trimmed skirt with the bias on the inside.
Bias trim on the inside makes the hem neat and adds a splash of colour too

After considering these options I am going to do a sewalong for the following skirt:
  • A-line
  • Quite long - my pattern is 72 cm long (about 28.5 inches) along the folded edge
  • A side zip - on the left because that's where I prefer it.
  • Inside facing - mine is 10cm long (4 inches) 
  • With a bias trimmed hem - not sure if this will be on the inside or outside yet - but it won't make a difference to the pattern anyway.
If you want to follow a design in the book mine, will be a longer version of the Meandering Vines skirt on pages 50-53.


THE PATTERN

Once you have made these decisions fill in the table on page 17 in the book to get the measurements you need to draw up your pattern.
I won't go into the fine detail of this as I feel that's the purpose of having the book and the publishers might not love it if I reprint the entire thing here!

It should look like this though:


I've written on the pattern the details that I included a 2" ease at the waist and a 3" ease at the hips.

Don't forget to add seam allowances as instructed, there are different measurements for this according to whether you are doing a fitted or elastic waist so read the instructions carefully.

You should be able to see the following numbers marked on my pattern above:

  1.  at the top on the left hand side on the curved solid line
  2. ABOVE the 1 - on the dotted line
  3. on the left part way down the pattern on the dotted line
  4. down near the hem
  5. where lines 1 and 2 meet
  6. at the other end of the dotted line to 3

I hadn't marked it yet on this pattern, but the side where numbers 1, 2, 3 and 4 are is the fold line, make sure you mark it.

Cut this out along the solid line and you have your finished pattern.

I will also say - TRUST THE MEASUREMENTS!
I felt my finished pattern was not big enough for me so added extra to it as I cut the fabric - and then took all the extra out as I sewed it up!

If you have any questions about the process of making the pattern up please feel free to email me or leave a comment.


FACE UP!

Now make up the facing:

Place a piece of tracing paper on top of your main skirt pattern.
Working from the curved line that is the top of the skirt waistband, measure down 10cm and make a mark at several places across the pattern.


Then join the dots together to make a line.
Also mark both the side lines and the curved top edge that make up the facing.


Place the tracing paper onto some card and draw the lines in texta so it goes through onto the pattern card.
Card is a lot easier to cut around when you are going to use a pattern multiple times.


This is what you end up with:
Don't forget to mark the fold line.


So here's what you end up with - a skirt pattern and also a facing that fits the shape of the top of the
skirt.


To move on and finish this skirt you will need your fabric, basic sewing supplies such as thread and scissors and a zip that is 18-20cm long.

Some of you may have already come this far in doing your homework prep so I will post again tomorrow morning with instructions for making up the panel.

See you then!

EDIT
You'll find part two here - Preparing the feature panel and cutting the pieces
Part three is putting in the zip
Part three is all about the facing
And the final part is all about how to finish the skirt off - the hem

And here are a few skirts other girls have finished, for inspiration, here and here and here and here!
They are popping up everywhere!

Tuesday, 24 May 2011

Crafty ladies night

Despite wet and cold weather there were crafty ladies out and about at our first Stitch and Yarn gathering last night.

Lynda was putting on the finishing touches on a quilt she made a few years back for her daughter,


Louise was working on quilt blocks for a block swap, that just happened to belong to the lovely Becky who I finally met in person at SIT in March.
The craft world is a small one isn't it!!


Cath was whipping up the cutest owl hat ever and getting the low down from the other wool-capable ladies Nicole and Lyndel about where to shop for materials.


And MJ was making amazing quilt blocks with complex patterns in delicious colours.


 Lyndel's knitting needle roll had to be seen to be believed!


There was also Judy working on some pattern cutting and crochet, Emma who was doing amazing illustration that I didn't get a pic of but will next time so you can all 'oooh' and 'aaah' like we did.

And I was chatting too much and sewing a little on another A-line skirt.

We had a number of apologies from ladies caught out with illness and work commitments who we will hopefully see next time.

All in all, a very enjoyable evening of chatting and craft.

Maybe we'll see you there next time, you'd be very welcome.
June 6th - put in your diary now, go on!

Monday, 23 May 2011

The weekend that was

What a great weekend.

I don't have any photos of what I was doing to show you - I didn't have my camera with me and so it was great to just be in the moment and enjoy.

We talked, a lot;
sewed, a lot;
ate, a little;
drank, a bit
and relaxed in this wonderful place.

The company was fabulous. Lots of funny, clever, talented, fun and helpful ladies.
(These descriptions apply to them all equally, not just the one they are linked to! Megan and 'Nikki's sewing buddy' were the other two lovely ladies who joined us, and they certainly apply to them too!)

I got lots made.
All for me.

Going away is a whole lot more relaxing when 'the guy who lives here' makes it so easy.
There's no guilt laid on me about having time to myself.
There's no demand as to when I have to be home.
He gets it; totally.
And I love him even more for that.


So here's what he and the girls got up to while I was away;

Butter wouldn't melt in their mouths would it...
Our standard zoo photo - their legs are getting very long!

Small child who just wants to be one of the gang.

Photo fun

This was on the door when I got home.

The chocolate cake they baked for my return was also enjoyed.


So thanks everyone for a lovely weekend - let's do it again, soon.

PS excuse the quality of the photos - they are all all iphone or Blackberry ones.


PPS - don't forget that SAY is on tonight - hope to see you there.

Thursday, 19 May 2011

Skirt homework...

So we're off to a bit of a slow start with the sewalong...

I've been a little preoccupied I must confess - I have big plans for the coming weekend...


In my defence, my plans do include making a few A-line skirts to test out the pattern and make sure I know what I am doing so we can sewalong as successfully as possible.

So please bear with me and let's make an official start a week from now - Wednesday 25th of May.

In the meantime - here's your homework!


  • Choose what style of skirt you'd like to make. I am going with a classic A-line as this suits my figure (curvy!) and is practical and comfortable for my lifestyle.
  • If you have the Sew What Skirts book - familiarise yourself with how to go about making up your pattern by reading pages 16-19.
  • If you are using a commercial pattern measure yourself and draft/trace off the pattern in the appropriate size.
  • If you are planning to use Prints Charming fabric scrap pack in your skirt - sit down and have a go at adding some embroidery to some of the pieces because I guarantee if you say you'll do it after you have finished the skirt, you won't!


And while you are here - why not grab a sew-along button as made by the very clever Gilly, just to jazz up your blog a bit. Thanks Gill.

sit 2 sew what skirts button


See you soon.

PS - everyone is welcome for this sewalong - whether you were at SIT or not and you don't have to use Prints Charming fabric - it's about having a go at making something for yourself and joining in with this community.