It would have come up next week....
We’re getting to the business end of things - any day now you will be strutting around in a fabulous new skirt that you made and even better, that fits you perfectly!!
Next up - Finishing the waist.
As I am doing a facing this is what I will give you step by step instructions for.
If you are using a heavy weight fabric such as denim or cord for the main part of your skirt you might like to consider using a lighter weight fabric such as a quilters cotton or linen for the facing as it will probably sit better and feel more comfortable against your body.
The steps involved in putting in the facing are :
- Sewing the second side seam and getting a good fit
- Making the facing up and sewing it to the garment
- Understitching the facing
- Topstitching the waist
First up sew the second side seam (the one with no zip in it) from top to bottom.
Now is the time to try on your skirt and check the fit.
Any adjustments should be made now.
As we move on adjustments will be harder to make.
 |
| Resew the seam with any adjustments |
Put your skirt on inside out, it’s easier to make adjustments this way.
Pin any excess you want to get rid of and sew the seam again - starting at the waist and merging into the existing seam.
Be sure to backtack at the bottom.
If you find your skirt is too tight then unpick the appropriate area and re-stitch the seam using a smaller seam allowance - you’ll be surprised the difference a few cm can make.
IMPORTANT
Whatever adjustments you have made here need to be replicated as you sew the two facing pieces together to ensure it will fit the waist of the skirt.
So if you ran it in - then run the waistband facings in too - or if you let it out then sew the facings using a smaller seam allowance.
Once you are happy with your personalised fit press the seam open and move onto making up the facing.
Take the two facing pieces and finish off two of the adjoining ends.
Press the seam open then finish the lower curved edge of the facing as well.
This is what you will have once you are done.
Join the two facing pieces right sides together (on the ends you have finished of course) and take into account any adjustments made earlier.
Press the seam open then finish the lower curved edge of the facing as well.
This is what you will have once you are done.
Run a line of stay-stitching along the top of both pieces - this is so you will later be able to clip into the curve without fear of it fraying.
Now pin the facing to your skirt - right sides together and matching at the side seam of the facing to the side seam of the skirt without the zip.
Stitch the facing to the main skirt.
Clip the top edge of the curve every 2cm or so, taking care not to clip into the stitching. (this is where your stay stitching is invaluable!)
Next we will understitch the facing so that it doesn’t roll to the outside, but this stitching cannot be seen from the outside.
This is really simple, once you work out the right place to put the stitching!!
Start by opening out the facing and skirt so they are side-by-side and press the sea allowances toward the facing.
Start by opening out the facing and skirt so they are side-by-side and press the sea allowances toward the facing.
 |
| This it the section you are pressing up |
 |
| Nice and flat - toward the facing |
You are going to stitch around the entire facing so the stitches run through the facing and the seam allowances. You so this by stitching on the facing side of the seam.
Once you are done, fold the facing back to the inside and press so you get a crisp edge at the waist.
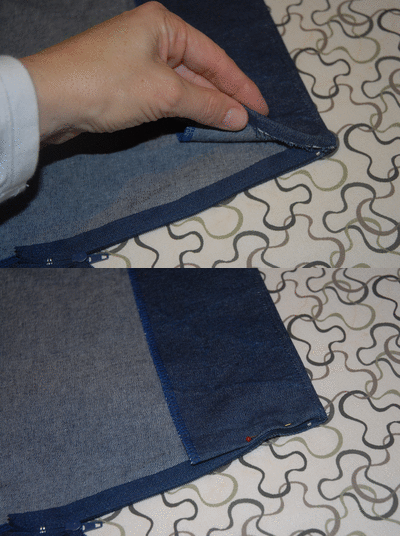
On each side of the zip, fold the ends of the facing under (to the inside) so they are clear of the zip.
You can hand sew the facing into place or if you just want to get finished, like me, then carefully machine stitch them down.
Now run a line of topstitching around the very top of the skirt to hold it all in place and finish things off neatly.
I also like to stitch in the ditch of the facing and skirt on the side with no zip as it keeps it from moving around.
So that’s it - facing/waist done!!
Last step tomorrow is to hem the skirt in whatever method you choose.
If you are keen to finish now then just do a simple turned under hem, turn it under twice so all exposed edges are hidden.
Otherwise come back tomorrow and we will talk about exposed and hidden bias binding finishes.
Sewing it all at once??
Here's where we started out - Making up the pattern and cutting the skirt.
You'll find part two here - Preparing the feature panel and cutting the pieces
Part three is putting in the zip
Once you've completed this step of putting in the facing - click here to finish off with hemming instructions.
And here are a few skirts other girls have finished, for inspiration.
Part three is putting in the zip
Once you've completed this step of putting in the facing - click here to finish off with hemming instructions.
And here are a few skirts other girls have finished, for inspiration.


No comments:
Post a Comment