Showing posts with label Sewalong. Show all posts

Wednesday, 15 June 2011

No wooden spoon here!

Early on in the sewalong, Megan wondered if she might end up being the winner of the wooden spoon - but here's proof that she is definitely not!


A great combination of Prints Charming reds and blues in the front panel.


Cute dotted denim for the back.


And here she is ready for winter - the scarf looks great with your skirt Megan!
Again I love the hint of red with the exposed bias on the bottom.

Sheridan will also not be awarded the wooden spoon as she has finished her PC skirt - check it out here.

And Lara has completed three more skirts!  See her second skirt on her blog here.

I've got the skirt bug and got my sister-in-law's measurements and made up an Anna Maria Horner and chocolate brown linen version for her birthday.

Excuse the dodgy pic - I snapped it just before giving it to her!!
For anyone yet to make a skirt up - generally it seems people are finding the waist turns out too big using the system in the Sew What Skirts book.

I used the 2" ease measurement for my first attempt and the 1" ease for my second and both times it was too big - keep this in mind and make sure you adjust the fit before finishing the waistband as you are making your own skirt.

I promise I will post some sewing other than skirts soon!!

Friday, 10 June 2011

Not so Silly Gilly

The very lovely Gillian of Silly Gilly joined in the skirtalong and look what she made!

Check out the lovely embroidery on the bird panel - oooh pretty.

I am particularly enamoured with the turquoise coloured piece of fabric in the top right, just over the bird's head.

The bias binding hem just brings it all together perfectly - isn't she clever.

Such a fun and colourful skirt - much like the lady herself!


If you joined in and completed a skirt - send me a pic so I can share it with everyone else.

Or are you going for the wooden spoon??

Thursday, 9 June 2011

Ta Da!

At last here are the finished pics.

They are not great - I'd been wearing the skirt and as you will see (from the fact that I am wearing the same boots and shirt) I just popped each skirt on for a few quick pics.

Regardless - here you go:

All done - and getting lots of wear - though soon some waist darts might be in order!
It's really comfortable to wear - quite long which is how I like them but perhaps a little too roomy around the waist, so I will modify my pattern slightly for next time.

I love the colours and the binding on the edge shows dots on the back section but not on the front - just the way the bias worked out - and I actually really like that.

Oops - should have given it an iron before photographing!
This one was my first practice skirt (to make sure I was giving you decent instructions!) and I wear it lots too.

It's made from some super-cheap $2/m stretch denim I got on the shopping trip at Sew It Together earlier this year and I sewed on some Anna Maria Horner and Patty Young Mezzanine dots to give it a point of interest.

I've left the edges of the circles raw and want them to fray in the wash, they look a bit stiff and proper here.

Hmm - should have smoothed that wrinkle out too!

And here's another one.
These skirts are on high rotation in my wardrobe - now I must make a few tops to go with them and complete the look!

This one is in some lovely Echino I bought from Patchwork on Central Park.  

It has a 'feature panel' as part of the design as it was a border print so there had to be some 'fancy' cutting - thanks to Lara for pointing me in the right direction with this while we were at Sewjourn.

I actually like the extra panel so much I wear it at the front.

Again - apologies about the lack of ironing!!
Another 'practice' version - I love this one so much - Echino = Yum!
I originally intended to put this binding on the inside - but rather liked it on the outside - so that's where it stayed!

Note to self - be aware of placement of small green birds...
So there you go, a new winter wardrobe of skirts for me.

What did I learn.....?

  • That I will most likely not buy another skirt for me again - it's that easy to make them.
  • That zips are really not that scary.
  • That a great piece of fabric - or a number joined together and embellished - provides the basis for a great skirt.
  • That it's really nice to have people comment on something you are wearing and when they ask where you got it be able to say "I made it".


How about you?
Did you skirtalong?
What did you learn?

Saturday, 4 June 2011

A hem, A hem, A hem

No, I wasn’t trying to get your attention - just wondering how you planned on finishing this skirt??

There are three quick and easy options that I am going to cover here:
  • Double fold hem
  • Bias binding shown on outside of skirt (pictures are for this)
  • Bias binding concealed on inside of skirt
One thing I would say before going any further is have a look through your fabric stash (Sheridan you might like to allow a day or two for this step...!!)
and see if there's anything that will coordinate well with your skirt.

The two skirts I did an external bias hem on lately, I didn't intend to.
But they just looked right.

Double Fold hem
I’m not even going to show you this one - it’s your 'basic fold under twice, press and stitch close to the top folded edge' hem.
A great tip that is in all the Oliver + s patterns is to stitch along the first fold line, press along this fold then tuck the raw edge under so it touches the stitched line on the inside. 
Press and stitch close to the top folded edge.
As my two year old would say “easy peasy lemon squeezy mama”. (and yes she says this to me often!)

The next finish is the bias hem shown on the outside of the skirt.

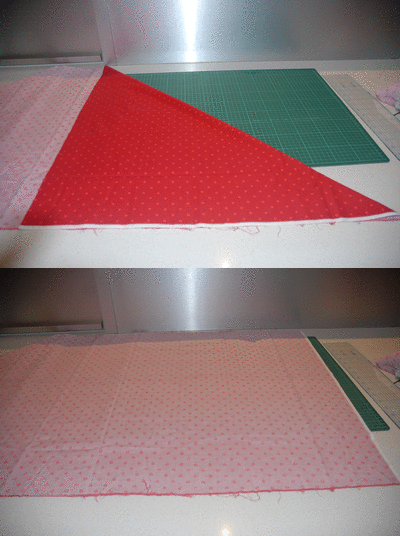
Firstly, because you have to run this fabric around a curve, cut it on the bias - that is along a 45 degree angle.
Do this by taking your fabric with selvedges lying along each side, and folding it with a 45 degree fold. 


Then grab your ruler and rotary cutter and away you go. 


 I won’t go into detail of how to join pieces to make the bias tape here - there are hundreds of tutorials on YouTube so check them out.

I am using an 18mm (3/4”) bias maker (Clover’s red one) so the strips are cut 35mm wide then run through the bias maker and under the iron.


Pin the right side of the binding to the wrong side of the fabric. 
Stitch right around your skirt on the fold line of the tape. (where the pins are positioned below).


Trim the edges.


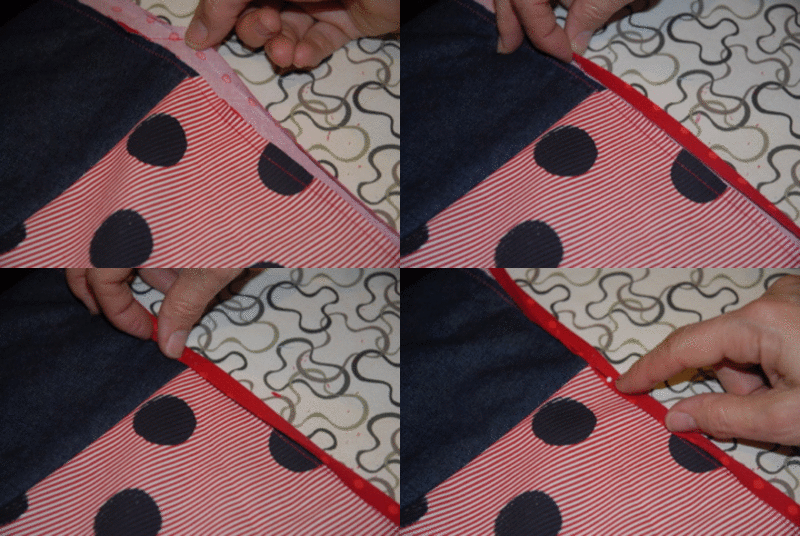
Now fold the bias tape up and over the hem edge so that the tape is now on the outside of the skirt.

Shown from the inside/wrong side of the skirt


Shown from the outside/right side of the skirt


From the right side of the skirt carefully stitch along the top edge of the binding to secure it.

Bias binding on the inside
If you feel your skirt is already quite busy print-wise with all the decorative fabrics, you might prefer to do a concealed bias hem.


The steps are pretty much the same as for the bias on the outside except for how you start!
Start with the right side of the bias to the right side of the fabric.

Stitch along the fold line, trim the edge then fold the bias to the inside of the skirt.
Stitch along the top of the bias to secure it.
Remember to use a different colour top and bobbin thread to match if you are using a contrasting bias.
Doing a binding is a great option for a bulky fabric as it reduces the bulk slightly.
It can also add a little pop of colour to the bottom of a plain skirt and it makes a very neat finish.


That's it!!
You're done - woo hoo.

Give it a good press and put it on and prance around a bit.


Well my skirting along friends, we have come to the end of our sewalong.
I’d love to see what you have been up to and maybe post a pic of the many and varied skirts (whether they be Prints Charming or not) here once you are done. 
So let me know in comments so you can send them to me.


I'll put a pic up of mine soon - once I can get 'the guy who lives here' to take it for me!
I hope you have enjoyed making your new skirt and that it fits like a glove!
Thanks for playing along.

Friday, 3 June 2011

Let's face it!

NB - sorry - I wrongly scheduled my scheduled post and left you all hanging! 
It would have come up next week....

We’re getting to the business end of things - any day now you will be strutting around in a fabulous new skirt that you made and even better, that fits you perfectly!!
Next up - Finishing the waist.
As I am doing a facing this is what I will give you step by step instructions for.

If you are using a heavy weight fabric such as denim or cord for the main part of your skirt you might like to consider using a lighter weight fabric such as a quilters cotton or linen for the facing as it will probably sit better and feel more comfortable against your body.
The steps involved in putting in the facing are :
  • Sewing the second side seam and getting a good fit
  • Making the facing up and sewing it to the garment
  • Understitching the facing
  • Topstitching the waist
First up sew the second side seam (the one with no zip in it) from top to bottom.
Now is the time to try on your skirt and check the fit.
Any adjustments should be made now. 
As we move on adjustments will be harder to make.

Resew the seam with any adjustments
Put your skirt on inside out, it’s easier to make adjustments this way.
Pin any excess you want to get rid of and sew the seam again - starting at the waist and merging into the existing seam.
Be sure to backtack at the bottom.
If you find your skirt is too tight then unpick the appropriate area and re-stitch the seam using a smaller seam allowance - you’ll be surprised the difference a few cm can make.
IMPORTANT
Whatever adjustments you have made here need to be replicated as you sew the two facing pieces together to ensure it will fit the waist of the skirt.
So if you ran it in - then run the waistband facings in too - or if you let it out then sew the facings using a smaller seam allowance.
Once you are happy with your personalised fit press the seam open and move onto making up the facing.
Take the two facing pieces and finish off two of the adjoining ends.


Join the two facing pieces right sides together (on the ends you have finished of course) and take into account any adjustments made earlier.


Press the seam open then finish the lower curved edge of the facing as well.


This is what you will have once you are done.


Run a line of stay-stitching along the top of both pieces - this is so you will later be able to clip into the curve without fear of it fraying.
Now pin the facing to your skirt - right sides together and matching at the side seam of the facing to the side seam of the skirt without the zip.
The open end of the facing slightly overlaps the open edge where the zip is.


Stitch the facing to the main skirt.
Clip the top edge of the curve every 2cm or so, taking care not to clip into the stitching. (this is where your stay stitching is invaluable!)
Next we will understitch the facing so that it doesn’t roll to the outside, but this stitching cannot be seen from the outside.
This is really simple, once you work out the right place to put the stitching!!


Start by opening out the facing and skirt so they are side-by-side and press the sea allowances toward the facing.


This it the section you are pressing up

Nice and flat - toward the facing
You are going to stitch around the entire facing so the stitches run through the facing and the seam allowances. You so this by stitching on the facing side of the seam.
Stitch close to the seamline for a neat result.


Once you are done, fold the facing back to the inside and press so you get a crisp edge at the waist.


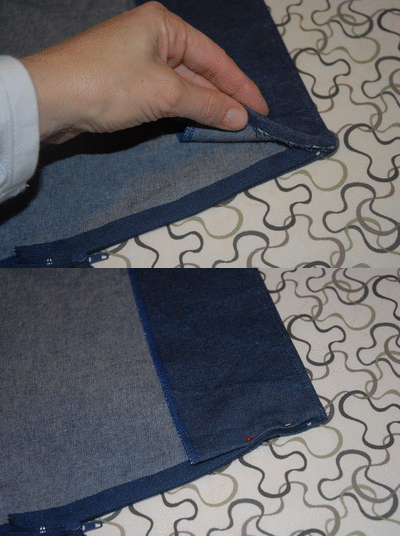
On each side of the zip, fold the ends of the facing under (to the inside) so they are clear of the zip.


You can hand sew the facing into place or if you just want to get finished, like me, then carefully machine stitch them down.
Now run a line of topstitching around the very top of the skirt to hold it all in place and finish things off neatly.


I also like to stitch in the ditch of the facing and skirt on the side with no zip as it keeps it from moving around.
So that’s it - facing/waist done!!
Last step tomorrow is to hem the skirt in whatever method you choose.
If you are keen to finish now then just do a simple turned under hem, turn it under twice so all exposed edges are hidden.

Otherwise come back tomorrow and we will talk about exposed and hidden bias binding finishes.


Sewing it all at once??  


Here's where we started out - Making up the pattern and cutting the skirt.


You'll find part two here - Preparing the feature panel and cutting the pieces
Part three is 
putting in the zip


Once you've completed this step of putting in the facing - click here to finish off with hemming instructions.

And here are 
a few skirts other girls have finished, for inspiration.

Wednesday, 1 June 2011

Skirting inspiration...

Donna and Lara have both been busy girls - and have finished their PC Skirts already!

Here's some inspiration for you to get started - if you haven't already.

Donna went with a yoke at the top in black denim and also used the black denim for the back, keep an eye on her blog for a post about it in the next day or so.


Lara did hers with a very fashionable exposed zip on the side and I think I see a bias hem on the inside too, perhaps in some of her favourite Kaffe Fassett...


Lara said she did the external zip using the same technique I mentioned in the last post but just did it on the outside.


Well done ladies - gold medal to you both I say!

The blue and greens in these skirts definitely make me keen to whip up another one...

Come back tomorrow for tips on putting in the facing and then we will finish up the last post with hem options.

I'm taking it slowly as I know everyone has lots going on in their days (work, kids, pets, partners, exercise, meetings!!) so I am assuming you don't get the chance to sew every day - as much as you would like to!

Tuesday, 31 May 2011

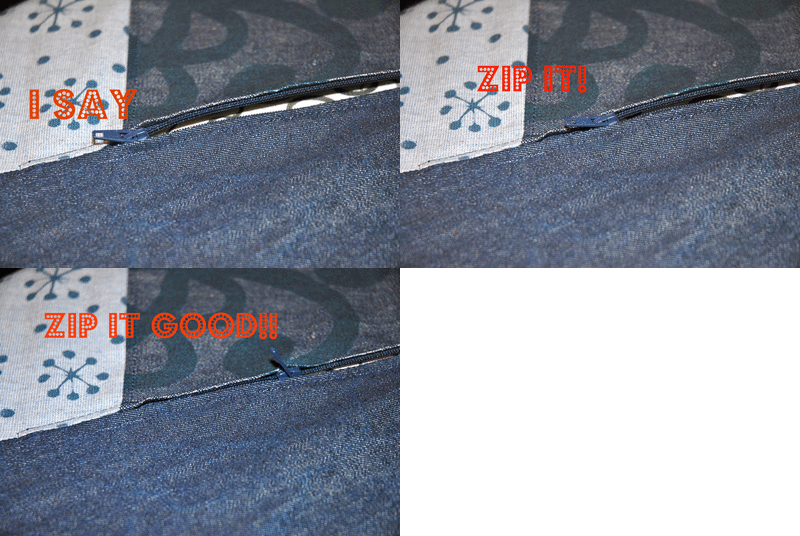
Zip it, Zip it good!!

Once you've finished your little rendition of Devo's 'Whip it' we'll make a start...

How’s your panel looking??


If you need to catch up you can check out the first two posts here:


Part One - Getting started - deciding what to make and making the pattern


Part Two - Preparing the feature panel and cutting the pieces


When you finished cutting you should have ended up with something that looks like this.

Two main panels - decorative front and plain back and two identical facings

In case you missed the instruction last time - you should now overlock the side edges of both the main skirt pieces.

Don’t trim anything much off here - you are just trying to finish the edges, so don’t overlock the two pieces together, we’re not making a seam.


Next, on to the zip.
I am working with an 18cm zip.
(NB. If you are making an elastic waisted skirt you can forget this whole zip business, just make your side seams, tailoring the skirt to fit.)
I have tried putting the zip in two ways - the way shown in the Sew What Skirts book and an alternate way shown to me by the lovely Kathryn of Our Shabby Cottage.


This was using the Sew What Skirts method - it's not sewn as close to the zipper teeth as the one below.


This was using the 'Shabby Cottage' method - much better result, not as 'gapey'. (yes I'm sure that's a word!)


I preferred both the result, and also the method, that Kathryn used - so that’s what I am going to show you now.
Take a deep breath - I promise you will be pleasantly surprised at how easy this is.
I prefer my zips to be in the left hand seam of the finished garment, so as you look at the skirt inside out you will now begin working on the right hand seam.
Trust me, when you turn it out the right way it will be on the left of the front panel.


Measure along your side seam and place a pin at the 19cm mark (remember an 18 cm zip is actually longer than this once you include the tape, the actual ‘teeth’ section is what measures 18cm).


Start by setting your sewing machine to a long basting stitch - so your longest straight stitch.
Now sew the seam using this long stitch until you reach the pin. 

Don’t finish sewing here - just backtack to secure the end then stop and leaving the needle in the fabric, adjust your stitch length to a regular length, and continue to sew the length of the seam to the bottom of the skirt.
Press the seam open.


With your skirt still wrong side out, open the zip and lay the right hand tape, right side down over the seam so the teeth of the zip are lying along the seamline. 
The top of the zipper tape, not where the teeth start, should be level with the top of the skirt, (if you have the teeth at the top you will find you have no seam allowance for attaching either a facing, bias or a waistband later.)

Pin the zip into place along this one side of the tape.
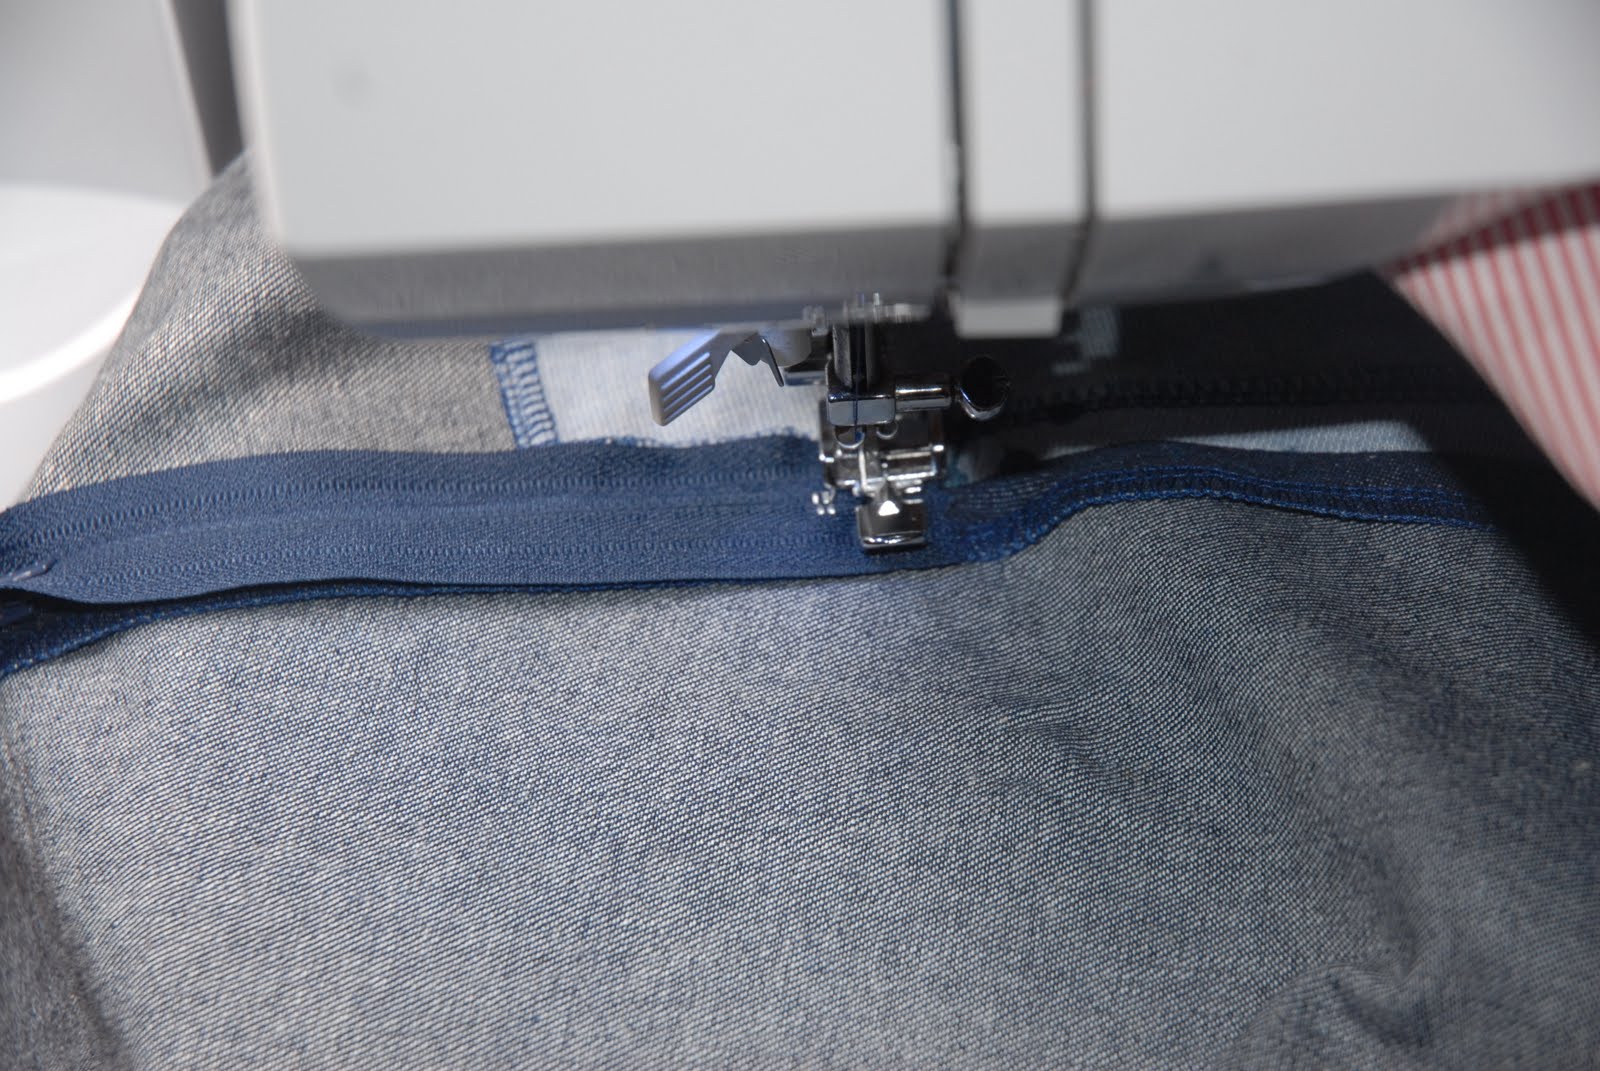
Before you sew make sure you have your zipper foot on your machine.
This is what my zipper foot looks like, get to know your feet - it really helps!


Now starting at the waist of the skirt, sew carefully down the right hand side, keeping the foot running as close as you can to the zipper teeth.

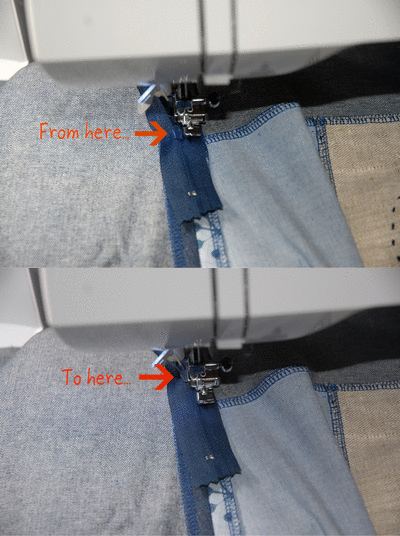
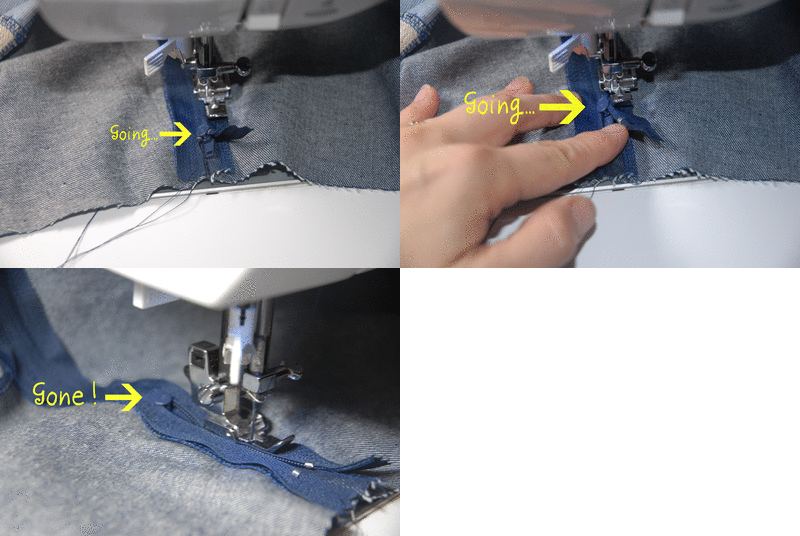
You will need to stop about 4cm from the end of the zip and move the zipper head so you can continue sewing.


To move the zipper head, stop sewing with the needle down, lift your presser foot and using your fingernail (or a pair of tweezers or a tailors awl) push the zipper head toward the waist of the skirt, closing the zip in the process.


Lower the presser foot and continue sewing to just beyond the end stop of the zip (this is the small piece of metal that marks the end of the zipper teeth.)
Again finish with the needle in the down position.
Lift the presser foot and turn the skirt 90 degrees so you can sew across the end of the zip.


Do this then turn the skirt 90 degrees so you will now be heading back along the opposite zipper tape toward the waist.


Check that the zipper teeth are lying along the seam line and pin the zip into place if you prefer, (I find it easier not to, but whatever makes it easiest!)
Sew along the zipper tape and when you reach the zipper head again leave the needle down, lift the foot and by putting your fingernail on the zipper ‘head’ push it along so it is clear of the foot.


Just like before...


Sew the remainder of the seam and backtack at the waist.
Phew - breathe out - all the hard work is done!
Now take your super-duper Clover seam ripper and, starting at the waist, gently remove the large basting stitches you put in earlier.


Now sit back and enjoy your handiwork, zip it up, zip it down, zip it up, zip it down!!


The next step is putting in the facing - click here to keep sewing along.