
I've mentioned lots of times that I have tall children and hence it is difficult to find things 'off the rack' that fit them well for length.
In fact getting pants to fit their waist as well as leg-length was one of the main reasons I started sewing again after many years, having sewn as a high school kid.
So here's a quick tutorial of how I lengthen pants - I am sure there are lots of ways - here's what I do.
Firstly measure the person (people!) you are making the pants for and compare the measurements to the size chart on the pattern envelope.
 |
| I've written the size the girls would fit based on the measurements next to the measurement themselves. |
Miss L is not far off at 53cm, showing her between the two sizes.
The same for their height measurements, both are a 7-8.
But I think the more important measurements are the hip and waist for these pants.
I don't want them to be saggy and baggy around the bottom , they are a fairly fitted pant, and both girls fit nicely into the size 6 for these measurements.
So I opted to trace off the size 6, which is the right size for both girls in the hips and waist, and then lengthen them as follows:
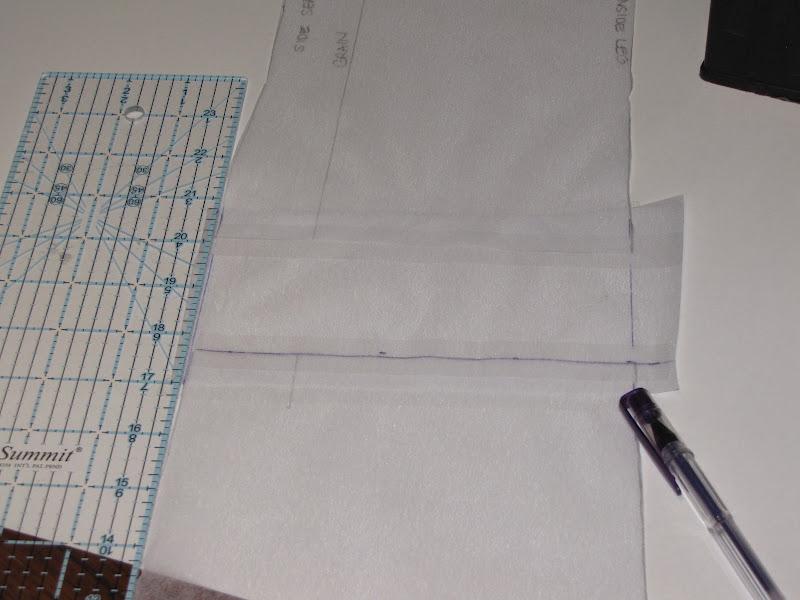
Firstly cut across the line marked on the pattern as being where you "lengthen or shorten".
 |
| I use sew-in interfacing for my tracing as it sticks to many fabrics when you go to cut, making it easy to use. |
The next step I forgot to do as I photographed the first bit so you won't see the tape in the next few pics - but you should do it!!
Tape the top pattern piece onto a spare piece of tracing paper.

Now measure down the amount you need to add in a few places and draw a line across to mark it.
 |
| See - nothing too hard yet is there?? |
Now get the lower leg portion of the pattern and, aligning the outer and inner leg edges, tape this along the line you drew in the last step.

To make the next step easier, use a ruler to join the lines along the outer edges of the pants, making the piece complete again.
 |
| All done - so simple. |
Then lastly trim off the excess tracing paper and you are done, you have now "lengthened your legs".
Don't forget to do the same to the other pattern piece as well - or you will have very strange looking pants.


4 comments:
Perfect - what a lovely little tutorial! One that I am never likely to need ;-) but plenty of others will! It's easy for me - I just fold out length at the same point!
oh so very excited to see you've written this post .... haven't even read much past the first sentence yet ... too excited!!! Thankyou you are a master & a gem!!
Fantastic job Thankyou for sharing... Now we can all make pants for stilt walkers as well as extra tall little people xxx ;}
Great tips Karen :) I have the opposite where legs are short!!
Post a Comment