There are three quick and easy options that I am going to cover here:
- Double fold hem
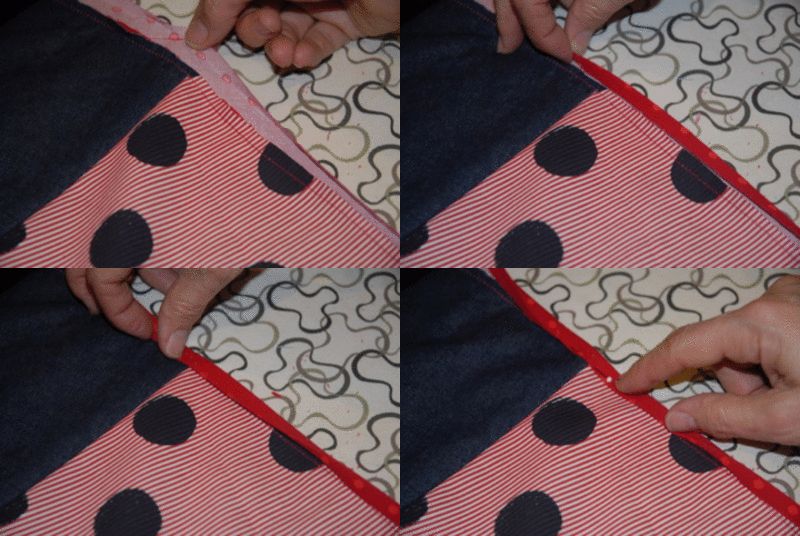
- Bias binding shown on outside of skirt (pictures are for this)
- Bias binding concealed on inside of skirt
One thing I would say before going any further is have a look through your fabric stash (Sheridan you might like to allow a day or two for this step...!!)
and see if there's anything that will coordinate well with your skirt.
The two skirts I did an external bias hem on lately, I didn't intend to.
But they just looked right.
Double Fold hem
I’m not even going to show you this one - it’s your 'basic fold under twice, press and stitch close to the top folded edge' hem.
A great tip that is in all the Oliver + s patterns is to stitch along the first fold line, press along this fold then tuck the raw edge under so it touches the stitched line on the inside.
Press and stitch close to the top folded edge.
As my two year old would say “easy peasy lemon squeezy mama”. (and yes she says this to me often!)
The next finish is the bias hem shown on the outside of the skirt.
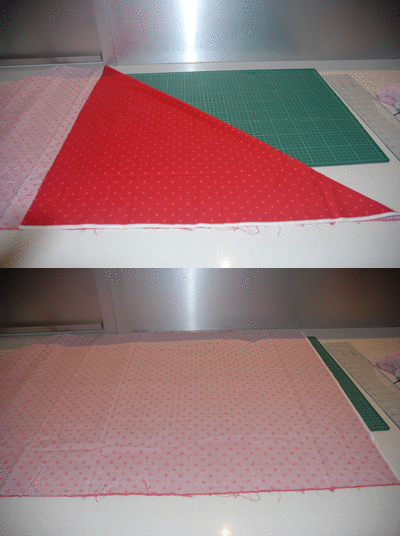
Firstly, because you have to run this fabric around a curve, cut it on the bias - that is along a 45 degree angle.
Do this by taking your fabric with selvedges lying along each side, and folding it with a 45 degree fold.
Then grab your ruler and rotary cutter and away you go.
I won’t go into detail of how to join pieces to make the bias tape here - there are hundreds of tutorials on YouTube so check them out.
I am using an 18mm (3/4”) bias maker (Clover’s red one) so the strips are cut 35mm wide then run through the bias maker and under the iron.
Pin the right side of the binding to the wrong side of the fabric.
Stitch right around your skirt on the fold line of the tape. (where the pins are positioned below).
Stitch right around your skirt on the fold line of the tape. (where the pins are positioned below).
Trim the edges.
Now fold the bias tape up and over the hem edge so that the tape is now on the outside of the skirt.
 |
| Shown from the outside/right side of the skirt |
From the right side of the skirt carefully stitch along the top edge of the binding to secure it.
Bias binding on the inside
If you feel your skirt is already quite busy print-wise with all the decorative fabrics, you might prefer to do a concealed bias hem.
The steps are pretty much the same as for the bias on the outside except for how you start!
The steps are pretty much the same as for the bias on the outside except for how you start!
Start with the right side of the bias to the right side of the fabric.
Stitch along the fold line, trim the edge then fold the bias to the inside of the skirt.
Stitch along the top of the bias to secure it.
Remember to use a different colour top and bobbin thread to match if you are using a contrasting bias.
Doing a binding is a great option for a bulky fabric as it reduces the bulk slightly.
It can also add a little pop of colour to the bottom of a plain skirt and it makes a very neat finish.
That's it!!
You're done - woo hoo.
Give it a good press and put it on and prance around a bit.
Well my skirting along friends, we have come to the end of our sewalong.
I’d love to see what you have been up to and maybe post a pic of the many and varied skirts (whether they be Prints Charming or not) here once you are done.
So let me know in comments so you can send them to me.
I'll put a pic up of mine soon - once I can get 'the guy who lives here' to take it for me!
I'll put a pic up of mine soon - once I can get 'the guy who lives here' to take it for me!
I hope you have enjoyed making your new skirt and that it fits like a glove!
Thanks for playing along.
Thanks for playing along.


8 comments:
Love your moving pictures! Thanks for the info, binding looks great on a skirt.
You have done some fantastic tutorials Karen! I'll be trying some other hemming options on my next skirts - maybe the Market Skirt (ordered it last week - yay)
aren't you fancy! What a great series of instructions.
modelling pic?
LOL! I'll start looking now then!
(I've been delayed. What I thought was black denim was blue and it looks funny. I am waiting on some black denim in the mail now....and I was so getting up to speed....)
So good! Love your flashy pictures. You're so clever. Thanks for all the great info.
I just finished my skirt! Prancing around as we speak!
I have just finished my skirt too - thanks so much for your instructions and for the inspiration! Do you have a flickr group for all the finished skirts?
Post a Comment